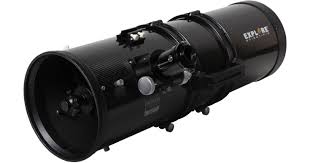
How to Attach My Camera to a Newtonian Telescope
Capturing the cosmos with a camera through a Newtonian telescope is a rewarding experience. By following the right methods, you can connect your camera to the telescope and start exploring astrophotography. Here’s a comprehensive guide on how to attach your camera to a Newtonian telescope, covering everything from the equipment you need to troubleshooting common issues.
1. Understanding the Basics of Astrophotography with Newtonian Telescopes
Astrophotography is a method of photographing objects in space, and Newtonian telescopes are excellent for beginners and experienced astronomers alike. Due to their design, Newtonians can yield clear, high-contrast images, but they require a solid attachment method to handle the camera’s weight and maintain stability.
2. Choosing the Right Camera for Your Telescope
- DSLR or Mirrorless Cameras: Digital Single-Lens Reflex (DSLR) and mirrorless cameras are popular choices for astrophotography due to their large sensors and ability to capture high-quality images. Both types can be easily attached to telescopes.
- Dedicated Astronomy Cameras: These cameras are specifically designed for astrophotography, with features optimized for capturing faint objects in the sky.
3. Required Equipment for Attaching a Camera to a Newtonian Telescope
To attach a camera to a Newtonian telescope, you’ll need the following tools:
- T-Ring Adapter: A T-ring is a camera-specific adapter that enables you to attach your camera to the telescope.
- T-Adapter: This part connects the T-ring to the telescope’s focuser. Some T-adapters are designed for prime-focus astrophotography, allowing for direct imaging.
- Barlow Lens (Optional): A Barlow lens increases the telescope’s focal length, which can help in magnifying objects. It attaches between the T-adapter and focuser if you need extra magnification.
4. Steps to Attach Your Camera to the Newtonian Telescope
Step 1: Prepare Your Camera and Telescope
- Check the Battery: Make sure your camera is fully charged or connected to an external power source, as astrophotography sessions can be lengthy.
- Remove the Camera Lens: Remove the camera lens to expose the camera body, where the T-ring will attach.
Step 2: Attach the T-Ring to the Camera
- The T-ring screws onto the camera’s lens mount, similar to how a camera lens would attach. Ensure that the T-ring you’re using is compatible with your specific camera model (e.g., Canon or Nikon).
Step 3: Connect the T-Adapter to the T-Ring
- After securing the T-ring to your camera, attach the T-adapter to it. This combination allows your camera to connect directly to the telescope without a traditional camera lens.
Step 4: Attach the Camera Assembly to the Telescope
- Insert the T-adapter into the telescope’s focuser. Most Newtonian telescopes have a 1.25” or 2” focuser; make sure your T-adapter matches this size.
- Tighten any locking screws to secure the assembly in place.
Step 5: Align and Focus the Telescope
- Point the telescope at a bright object, such as a star or planet, and use the telescope’s focuser to achieve a sharp image. It may take some trial and error to achieve perfect focus.
- For finer focusing, consider using a Bahtinov mask. This tool creates a diffraction pattern that makes it easier to find perfect focus.
5. Additional Techniques for Better Astrophotography
Prime Focus Photography
Prime focus photography is the most common method for astrophotography, where the camera’s sensor captures the telescope’s direct light, essentially turning the telescope into a large telephoto lens.
Using Barlow Lenses for Greater Magnification
A Barlow lens can be added to increase the focal length of your telescope, which effectively zooms in on distant objects. Attach the Barlow lens between the T-adapter and the telescope to boost magnification.
6. Balancing Your Telescope for Camera Weight
Attaching a camera to your telescope can make the setup front-heavy, affecting stability. Adjust the counterweights on your telescope’s mount to achieve proper balance.
7. Common Issues and Troubleshooting Tips
Inability to Reach Focus
One common problem with Newtonian telescopes is not reaching focus when the camera is attached. This is often due to insufficient inward focus travel.
- Solution: Use a low-profile T-adapter or consider modifying your focuser. Some astrophotographers use a “coma corrector,” which can improve focus and image quality.
Image Quality Issues
Astrophotography can reveal imperfections like coma (distorted stars near the image’s edge) due to the Newtonian design.
- Solution: Use a coma corrector, which is specifically designed to address these optical issues.
8. Fine-Tuning Your Astrophotography Setup
Experiment with Exposure Settings
Set your camera to manual mode to adjust exposure time, ISO, and aperture (if applicable) to capture the best possible image quality. For deep-sky objects, longer exposures and higher ISOs can reveal fainter details.
Remote Shutter Release
Using a remote shutter release or timer can minimize vibrations when capturing images. This is especially important when using longer exposure times to avoid image blur.
9. Post-Processing for Astrophotography
Astrophotography images often require post-processing to bring out details and enhance colors. Software like Adobe Photoshop or DeepSkyStacker can help stack multiple images, adjust contrast, and reduce noise.
Conclusion
Attaching your camera to a Newtonian telescope opens up new possibilities in astrophotography. With the right adapters and techniques, you can capture stunning images of celestial bodies and deep-sky objects. Remember that practice and patience are key in astrophotography. Experiment with different settings, try various objects, and refine your skills to achieve impressive results.
FAQs
- Can I use a smartphone with a Newtonian telescope? Yes, with a smartphone adapter, but DSLR or mirrorless cameras offer better quality for astrophotography.
- What is prime focus astrophotography? It’s a method where the telescope acts as the camera lens, directly capturing light onto the sensor.
- How do I avoid blurry images? Use a remote shutter release, balance the telescope, and ensure the mount is stable.
- Do I need a tracking mount for astrophotography? For deep-sky photography, yes. A tracking mount helps follow celestial objects as they move.
- What’s the role of a Barlow lens in astrophotography? A Barlow lens increases magnification, which is helpful for photographing planets or smaller celestial objects.